How to Shoot Silhouettes at Sunset: Settings and Step-by-Step
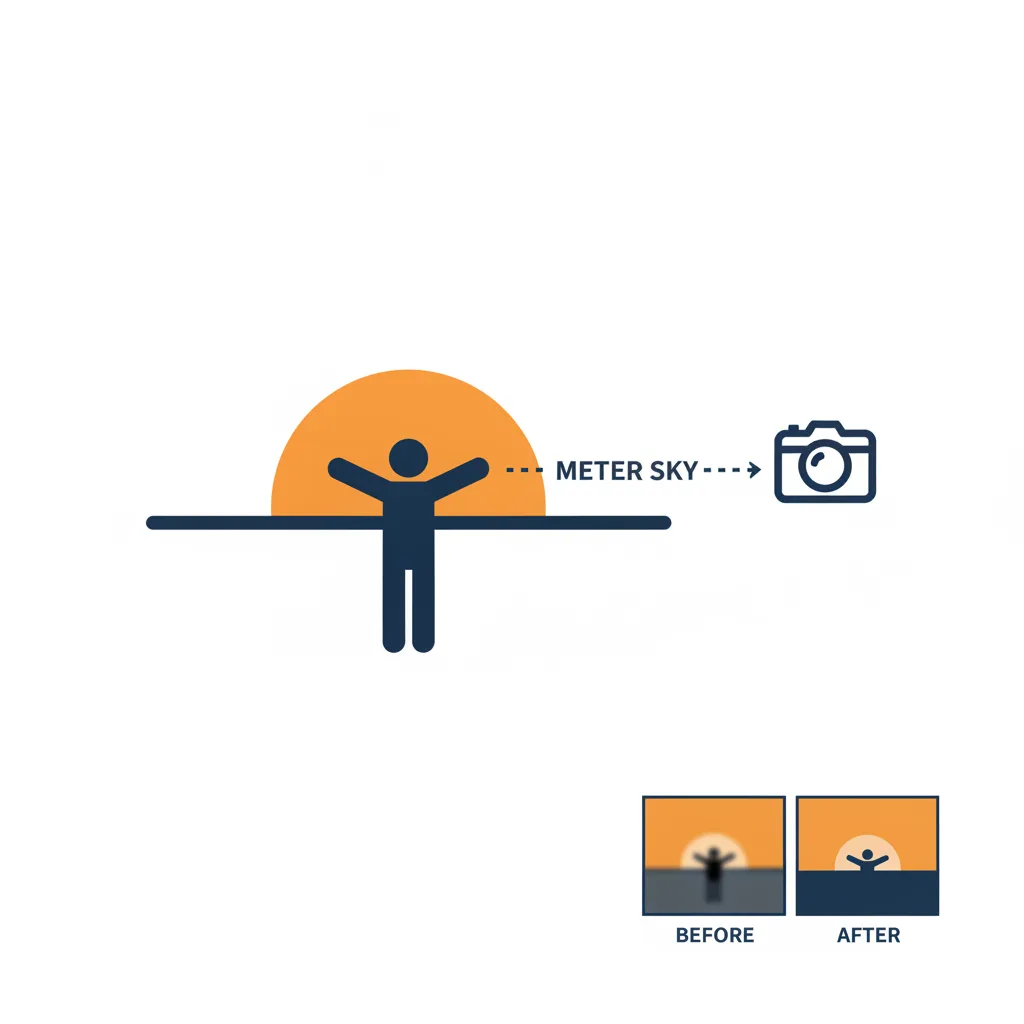
A silhouette is a photo where the subject appears as a dark shape against a bright background, and you get it by exposing for the sky, not the subject. Done well, it turns a person, a tree or a building into a clean graphic outline. It is a forgiving technique, because the subject does not need good light, only a clear shape.
What you need
- A bright background, such as a sunset or sunrise sky
- A subject with a clear outline: a person, a tree, a pier, a doorway
- A camera that lets you lock exposure or use exposure compensation
- A few minutes near sunset, ideally with a spot where the sun is low
Settings to start from
These come from the Sunset Silhouette recipe in the Scene Recipe set.
| Setting | Starting value |
|---|---|
| Mode | M or A |
| Aperture | f/11 |
| Shutter speed | 1/250s |
| ISO | 100 |
| Focus | AF-S on the horizon |
| White balance | Daylight |
| Exposure compensation | −1 EV |
Step by step
- Place your subject against the brightest sky. Position yourself so the subject stands in front of the glow, not off to the side.
- Meter on the sky beside the sun. Aim at the sky, not at the subject or straight into the sun. In aperture priority, point the camera at the bright area and read the exposure.
- Lock the exposure, then recompose. Use exposure lock, then frame the shot the way you want.
- Shoot when the sun is just above the horizon. The sky is rich, and the subject stands out.
- Check the screen and the histogram. Highlights should keep detail in the sky, and the subject should read as a solid dark shape.
If you are unsure, shoot one frame at −1 EV and another at −2 EV, and keep the one with the richer sky.
Keep the outline clean
A silhouette lives or dies by its outline. Look at the edges of your subject:
- Move until limbs and edges do not overlap. Two people standing side by side can merge into a blob, so separate them.
- Show the shape in profile. A face turned sideways reads clearly, while a front view loses detail.
- Keep the horizon level, and avoid cutting the subject at the joints.
- Remove clutter. A busy background hurts the shape.
Backlight without losing the face
A silhouette is a choice. If you want to see the face as well, you need a different technique, which is backlight and rim light: place the sun low behind the subject, meter on the face and add about +1 stop, then fill the shadow side with a reflector or flash. The Backlight & Rim Light card walks through this, and it is covered in the portrait lighting guide. If the camera meters on the bright sky, the subject turns black. That is exactly what you want for a silhouette, and exactly what you do not want for a portrait.
Common mistakes
- Metering on the subject. The sky blows out. Meter on the sky.
- A cluttered outline. Move until limbs and edges do not overlap.
- Leaving too early. Wait about 10 minutes after sunset. Colors often deepen once the sun is gone.
- Letting the sun sit in the frame at full strength. Hide it behind the subject or keep it low, so it does not wash out the image.
More to read
The best sunsets rely on timing: see the golden hour guide for when to arrive. The histogram guide helps you confirm the sky is not clipped. And if the moon is up, photographing the moon needs completely different settings.
What ShotCraft Field Cards gives you
The bonus Scene Recipe Cards include Sunset Silhouette, with the settings above, two common mistakes and a tip: wait ten minutes after sunset. The main set adds the Backlight & Rim Light and Golden Hour and Blue Hour cards. Print the cards at A5 or US Letter and carry the one you need.